

Having spent some time working on as faithful a set of "One-Hour Wargames" Medieval Rules with minimal changes / mechanics added [posted Oct 3], I figured I should play, just in case I overlooked some things. And of course I did! And I also overlooked posting this AAR - just got lost in the shuffle and the sudden drive to finish up my version and well, there was some Army in there along the way, also. Anyway, on with the story...I decided to go with Scenario #4 "Take the High Ground" because it is not only a classic military mission, but because it is not too complicated and will let the rules and Units shine forward with military honors [or not...].
Above is my take on the table - pretty faithful - but I have a hill that is twice as wide as needed [12" instead of 6"]. I ended up putting the crest in the same place as the book - 15 inches in - as the crest is the single most important feature of the hill. Altho the model hill is a plateau, I didn't use it as such today. If I had, the plateau around the edge would've been a crest line that would limit line of sight across it to 3".

Red Defenders and their cunning plan. They start with a won game, and just need to keep the hill to close the deal. I'm planning to push 2 Knights at the hill, run the Levy up the road at 9" a turn, supported by 1 Knight. On the hill, I've Men-at-Arms on the left to hold the open flank - in melee, they Hits against them are halved due to their Armor. The Archers will use their range to hit targets in the road. Both Units are at the Crest [marked by the white branch] so are "uphill" of everyone attacking them. They are angled back to protect their vulnerable open flanks until the Knights arrive. Let's hope it all works out!

Blue attackers and THEIR cunning plan. Blue is in a tougher spot. With only one move of an advantage, they need to seize a hill held by one very tough Men-at-Arms Unit on the left, and a dangerous [at range] Archers Unit on right. The plan here is to push hard up the left onto the open flank of the MaA Unit, and push hard with their own MaA up the road protected by 1 Knight. The Archers will trail behind and shoot up anything on the hill they can spot. Hopefully, the combination of missiles and charges will take the hill!

Turn 1 Below. Red holds their ground [note that they go first, bringing on their rein-forcements at the TOP of Turn 2] but reaches the Blue Knights with poor bow shots, rolling a '1' and getting 3 Hits. Blue pushes max 9" up the road with MaA followed by the line of Archers. Knights lead their front right side. To left, Knights maneuver to flank the hill.

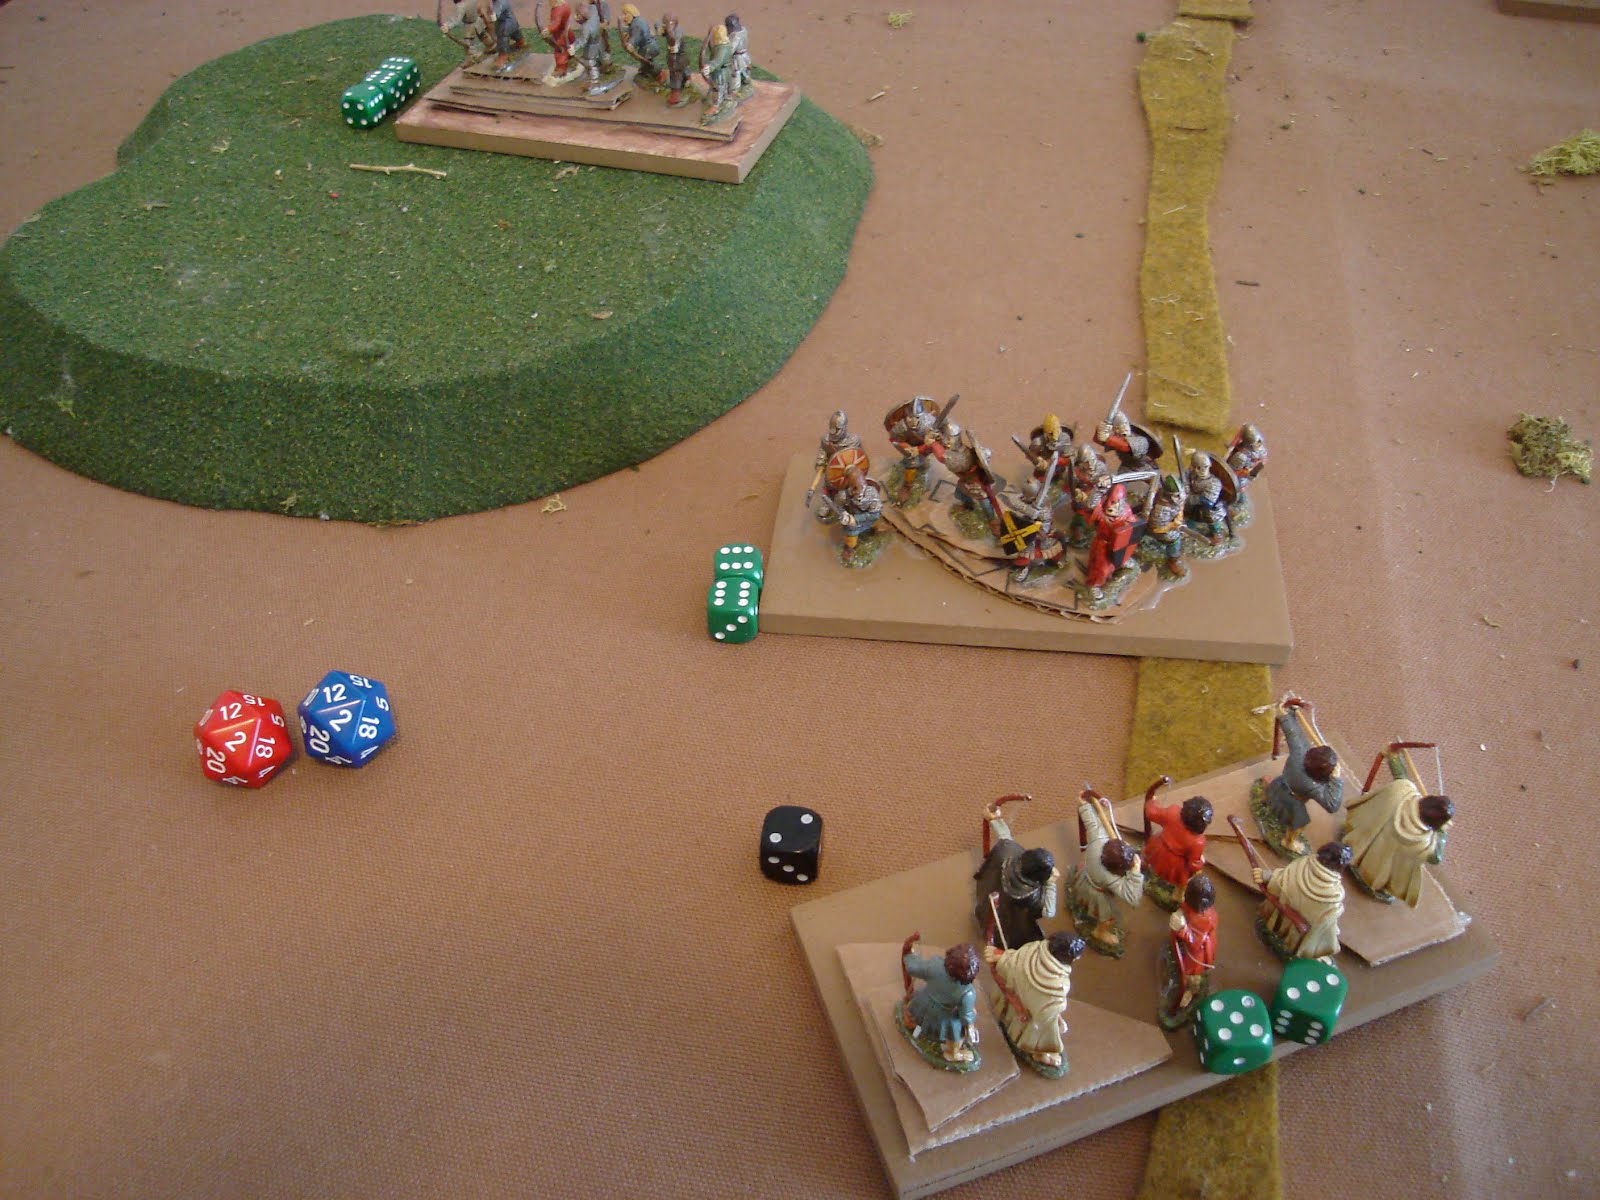
Turn 1 left flank: a classic Pin and Outflank maneuver. Knight 1 will work around the flank but isn't there yet. The MaA on the hill can hit THEIR flank as they pass them, so Knight 2 is covering it. It would be sort of suicidal for them to charge down to be counter-charged on their flank. They are tough on the defense, but they would still go down in 3 Turns as the halving of Hits due to their Armor would be cancelled by the doubling for the Flank Attack. This also shows the benefit of support Units covering your advance Unit's flanks.

Turn 2. Red reinforcements enter per cunning Red plan, their Archers have lots of choices, but shoot advancing Knights 3. Blue continues advance up road. In retaliation, Blue Archers almost wipe out Red Archers rolling two 5s for 5+2=7x2 Hits! With 1 Hit left, the future doesn't look good...You can see Knight 1 has worked around the MaA's flank at left.

Turn 3 left flank. Red Knight 1 advances against Blue Knight 1, and I turned and moved the damaged Archers to support them. The trap of both melee and firepower was too much to face so Blue Knights 1 did a 180, zipped back, and did another 180 to face the enemy - all faster than a Tiger Tank - they will survive but what about the attack against the hill?

Turn 3 center-right. With the Red Archers swung around, there's room for Red Knight 2 to take their place. Red Knights 3 charges in, inflicting the max of 6+2=8 Hits, bringing Knights 3 to 11/15 and almost done! The Levy advance up the road to protect flanks. The MaA on the road forgot to charge [fixed later]. Knights 2 advance up the hill, protected by Archers to right. The last Archer is covering the gap soon to come when Knights 3 are wiped out.

Turn 4. Red Knight 1 and Archers advance again to threaten Blue Knight 1, who retreats farther away to bottom center. Red Knights 2 charge Blue Knights 2 for 7 Hits, but take 7 from the Archers and 3 from the pathetic Blue Knights. In the Center, the Levy are losing against the MaA Armor and their own dice. Blue Knight 3 is blasted with over 20 Hits, and Blue Archer 2 shoots for 4+2=6 Hits, hoping it will be enough!

Top of Turn 5 Left-Center. I reposition the Red line to face the hill and Blue force. Red Knight 2 does the max - breaking opposing Blue Knight 2 in 2 Turns! [The +2 is a bigger deal than you'd think, rolling a 6 gives you 8 hits, then a 5 or 6 will make it 15 Hits].

Bottom of Turn 5. Blue Archers wipe out the Glorious Red Knight 2, inflicting 7 hits! Blue Knight 1 charges Red MaA for 3 Hits [marked wrong], but this was a bad idea - I should've charged Red Knights 1. Red Knights 3 covered themselves in shame by rolling a '1' and inflicting 3 Hits on Blue Archers 2, who retaliate for 6-2 Hits! Life is bad when you're beat up by peasants...The Blue MaA on the road remember they're "not charge" on Turn 3, so I roll twice for them, and it makes no difference - they get the Levy to 14 Hits, so will lose another turn with the peasants in the road.

Turn 6. Red Knights 1 charges in for 6x2=12 Hits on the flank of Blue Knight 1, and the MaA add another 2, putting them at 14/15 Hits and the "soon to die" roster for next turn. Red Archers roll 8 Hits on the Blue MaA, halved due to Armor, putting them at 10 total. Still the MaA rout the Levy and their Knights 3 follow them routed by the Welsh Archers who are apparently even fiercer than they look [must be the long moustaches]. Blue Archer 1 rotates to provide support fire anywhere needed on the line, most likely against Red Knight 1.

Turn 7. Unsurprisingly, Blue Knights 1 are wiped out. Blue Archer 1 rolls a '1' for 3 total Hits - this is a bad time to lose your mojo, is all I'm sayin'. Red Archers turn and fall back off the hill to avoid a shot from Blue Archers - keeping them alive really matters at this point! Overall, Red has three Units with 22 Hits, Blue 3 with 18 Hits, not much advantage for a side that still needs to take a hill!

Turn 8. Red Archers move back up as their Knights charge into the only Archers that can shoot them. Blue Archers 2 turn to shoot in support of their pals, Blue MaA fall back. The Melee is uninspiring, with few Hits coming into play.

Turn 9. Red MaA and Archers advance to threaten Blue Units. Blue Archers roll up some Hits, but should've switched Dice! Shooting they're d6+2, in melee d6-2...

Turn 10. Knights 1 rout Archers, Blue Archer 2 routs them in turn. Red MaA advance in threatening manner while their Archers put another 3 Hits on Blue MaA who have 13/15...

Turn 11. Blue MaA rout. Their Archers shoot but blow it rolling a '1' for 2 Hits.

Turn 12. Red MaA are angry...Welsh Archers are nervous and roll crappy again.
Turn 13. Pathetic melee rolls.

Turn 14. Astonishingly, the Welsh Archers rout the MaA - they must've been tired. I guess the Welsh problem was an arrow shortage, not a moxie shortage!

Turn 15. Battle ends with Red Archers repositioned to cover the road, and the Welsh advancing down said road in threatening manner. At 11 to 14 Hits, they can both wipe each other out in one shot. So something of a tie in terms of damage, but certainly the hill is in Blue possession, just like at the start of the battle. A hard-fought engagement!

A good battle and very interesting to play. As I am experienced with the rules, I shouldn't make too many errors with them, so the most important aspect should be mission focus and luck. I did make a couple of important errors, however, like charging Blue Knight 1 into the Red MaA instead of the Knights - must have been distracted taking pics. Die rolling was quite varied on both sides, with astonishing highs and lows all around.
Aside from that, I thought the game went just fine, and with the "minimal changes and additions" plays pretty smoothly as-is. Note that I haven't changed anything, just "finished" making decisions about game mechanics that are really the responsibility of the game designer. With these - or similar - in place, the game achieves what NT clearly wants: a fast-play game that is scenario-focused and hits the big points without wasting a lot of time and energy on "feel".
A few things worth commenting upon:
- 2 free turns for Units, before and after the straight-line move. This allows a LOT of gamey play with the Units, almost like they are fighter planes as they swoop out of each other's Front Arc to avoid being shot at or charged. It's a bit unrealistic. The Fix? Allow one turn, save two turns for more highly trained troops or skirmishers.
- Shooting into Melee is for me a mechanic more than a reality. It makes the Bowmen a support unit and rids us of gamey maneuvers like avoiding being shot at by being in melee! Otherwise they feel like a sniper Unit, sort of the equivilent of an '88 in a WWII game. I think it they're toned down to shoot D6 instead of D6+2, it makes for a better balance. I'd use D6-1 for poor archers, and D6+1 for better units of mercenary crossbows and such.
- Bowmen are too powerful for the early period. They impact the game like English Longbows for both sides. In essence, they shoot as powerful as Knights charge.
- The 15 hits for all can be tinkered with...I've trouble with knight Units having the same Hits as peasants, but it is all about definition also, so this isn't a game mechanic. For a more "peasant-y" unit, I could make it 12 hits, while an elite Knight unit could have 18.
Archers - none usually, 6 for fierce resistance or being in woods perhaps?
Levy - '6' [for shielded formation]
Knights - '5-6' [for armor, shields, fierceness, but no armor on horses]
MaA - '4-6' [for armor, shields, fierceness and close protective formation]
Give it a shot?
I did play a second time, and managed my attack better given the same setup, and won a decisive victory for Blue, with five units left! I leveraged Blue firepower better, also.
Final Word.
"One-Hour Wargames: Medieval Rules" has a lot of energy and dynamics with a fast-paced movement and linear / attrition combat system. There's nuance along the way to 15 hits, more than you think at first. For me, this plays like a "large skirmish" game and is a wild ride, but the better player will win most battles - which is as it should be.
Highly recommended!
Oh, and in case you were wondering...
[Turn 16!?] Couldn't resist seeing what happened! Red goes first turn 16, rolls high, and Blue Archers flee - total Red Victory!

No comments:
Post a Comment
Thanks for your comment! t will be posted after it's moderated.